New campaign
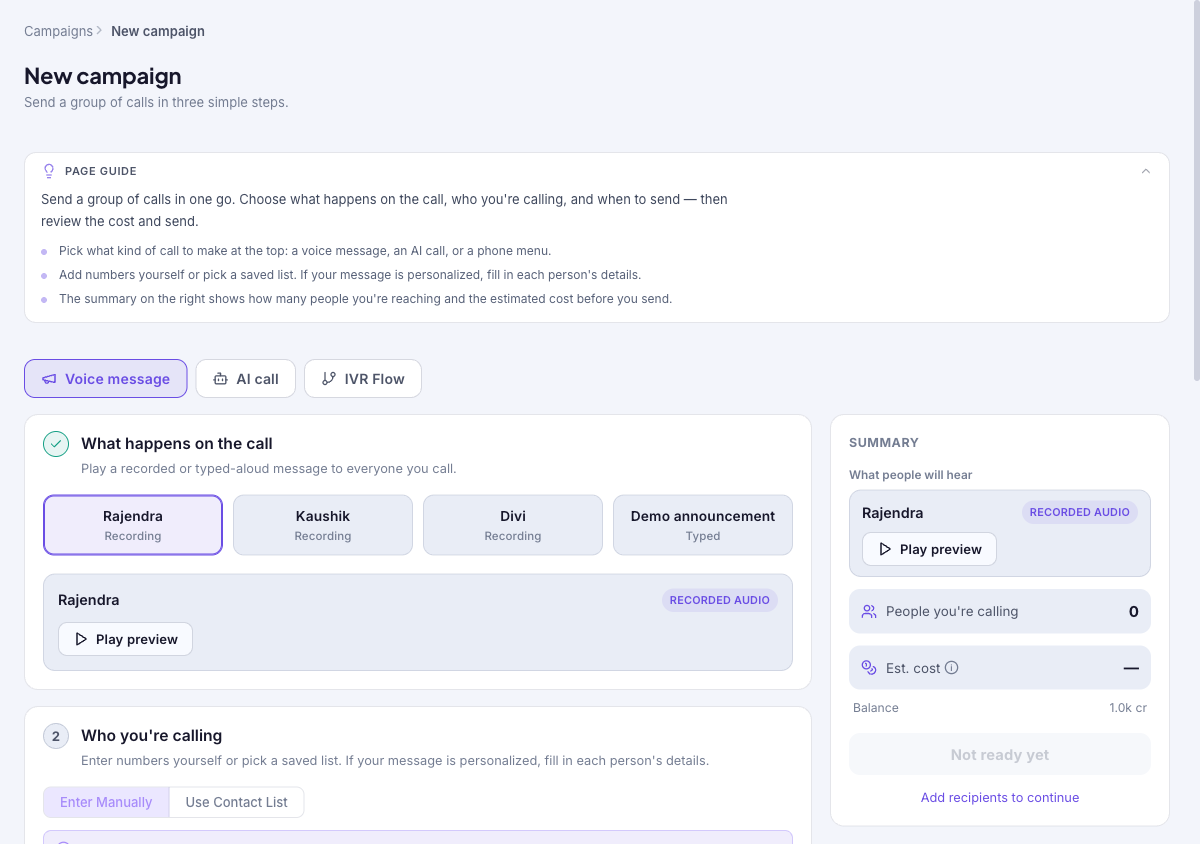
Send a group of calls in three steps using the Campaign Composer: choose what happens on the call (a voice message, an AI call, or a phone menu), choose who you are calling, then set the sender number and timing. A running summary on the right shows how many people you are reaching and the estimated cost before you send.
Audience: Campaign creators · Page address: /app/campaigns/new · Your admin may need to enable this feature
Common tasks
- Choose the campaign type
- Pick what happens on the call
- Add recipients manually or from a contact list
- Set the sender number and send now or schedule
How to use this page
1. Pick the campaign type
Choose what kind of call this campaign makes, since the rest of the form changes to match.
- Open the composer with New Campaign, Start a campaign on the dashboard, or go straight to it from the Campaigns list.
- At the top, choose the Campaign type: Voice message (play a recorded or read-aloud message), AI call (an AI agent holds a real conversation with each person), or IVR Flow (a phone menu where people press keys).
- The three steps below adapt to your choice. The Summary rail on the right updates live as you fill things in.
2. Choose what happens on the call
Set the content of the call — this is step 1, and it differs by campaign type.
- For a Voice message, pick one of your voice messages from the list and use Play preview to hear it. Manage the messages themselves on the Voice messages page.
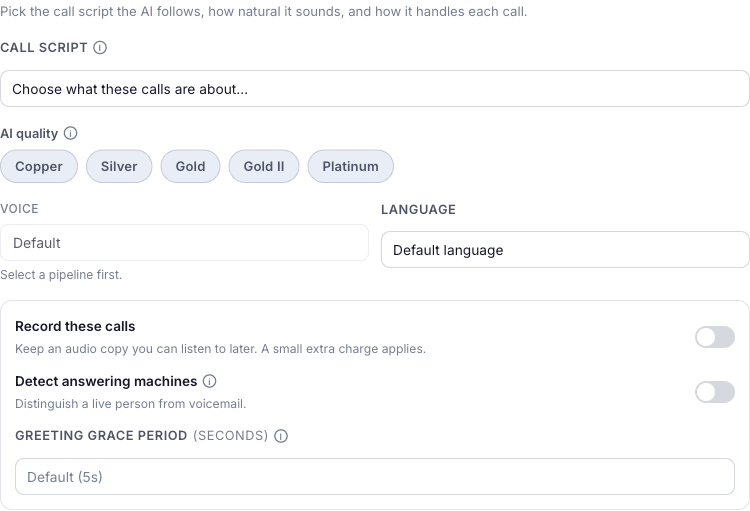
- For an AI call, choose the Call script the AI follows, then set the AI quality tier (Copper, Silver, Gold, Gold II, or Platinum — higher tiers sound more natural and cost more per minute), and pick a Voice and Language. Manage scripts on Call scripts.
- For an AI call, also set call handling: Record these calls (a small extra charge applies), Detect answering machines (so the AI knows whether a person or voicemail picked up), and an optional Greeting grace period in seconds so the AI's greeting is not cut off.
- For an IVR Flow, pick the phone menu to run.
3. Choose who you're calling
Set the recipient list — this is step 2.
- Choose an input mode: Enter Manually to type numbers, or Use Contact List to select a saved list.
- For manual entry, type one number per line. This is capped at 100 numbers per batch; Indian numbers without
+91are normalized automatically (for example9876543210becomes+919876543210). - To reach more than 100 recipients, upload them as a contact list and choose Use Contact List — lists of any size are supported.
- If your message or script is personalized, fill in each person's details so the per-contact fields resolve at send time.
4. Set the sender and timing
Choose the number people see and when the campaign runs — this is step 3.
- Under Number people will see, pick one or more of your phone numbers. When several are selected, they are rotated evenly across recipients; a voice message campaign dials with a single number, so it uses the first one you pick. Filter by provider (for example Vobiz, Telnyx) using the buttons above the list.
- Optionally set a Campaign name so it is easy to find later on All campaigns.
- Under Attach automations, add a compatible automation to run after each call — or Create one if none exists yet.
- Choose a Scheduling mode: Send Now, or Schedule for Later to set a schedule name, date and time, timezone, a status-check interval, and optional retry rules for calls that fail.
5. Review the summary and send
Confirm what you are about to do before it reaches real people.
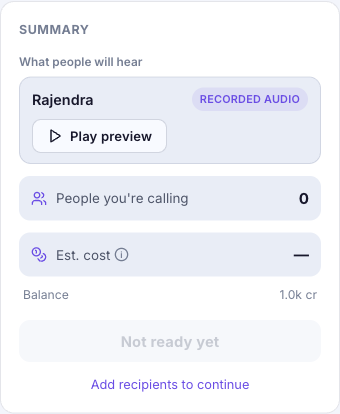
- Read the Summary rail: What people will hear, People you're calling (the recipient count), Est. cost, and your Balance.
- The estimated cost is a per-minute "from ~" figure — the real cost varies with how long each call lasts.
- The send button stays disabled (Not ready yet / Add recipients to continue) until the campaign has recipients and the required fields are set.
- When everything is set, send the campaign — or save the schedule if you chose Schedule for Later. Track it afterward on All campaigns and open it for the full breakdown on campaign detail.
Tips and troubleshooting
- Review campaign settings before dispatch because recipient mistakes can be expensive to unwind.
- Use analytics after delivery to compare completion, failures, and response trends before sending the next batch.
- The summary rail on the right shows your recipient count and an estimated cost before you send — check it every time, since a live campaign calls real people and spends credits.
- Manual entry is capped at 100 numbers per batch. To reach more, upload a [contact list](/docs/contact-lists) and choose "Use Contact List".
- Estimated cost is per-minute, so it is a "from ~" figure — the real cost depends on how long each call lasts.