Messaging connections
Connect and manage the messaging accounts MagickComms sends through — a WhatsApp Business number, a Telegram bot, an email sending domain, or a linked personal WhatsApp number — and monitor each connection's send, delivery, and failure counts.
Audience: Messaging operators · Page address: /app/messaging/connections · Your admin may need to enable this feature
Common tasks
- Add a connection
- Review connection health and status
- Copy a connection's invite link
- Edit or revoke a connection
How to use this page
1. Understand what a connection is
Know what connections do before adding one, because messaging cannot happen without at least one.
- A connection links MagickComms to one place it can send from — a WhatsApp phone number, a Telegram bot, or an email sending domain. The page guide summarizes this at the top.
- You need at least one active connection before you can send messages. Both automations and direct message sends deliver through the connections managed here.
- Note the prerequisites per provider: WhatsApp connections require a Meta Business phone number; Telegram connections require a bot token from @BotFather; email connections require a verified sending domain.
- WhatsApp and Email sends use approved messaging templates, so set up the matching connection here first, then author templates against it.
2. Read the connections list
Check the health of every connection at a glance and find the one you need.
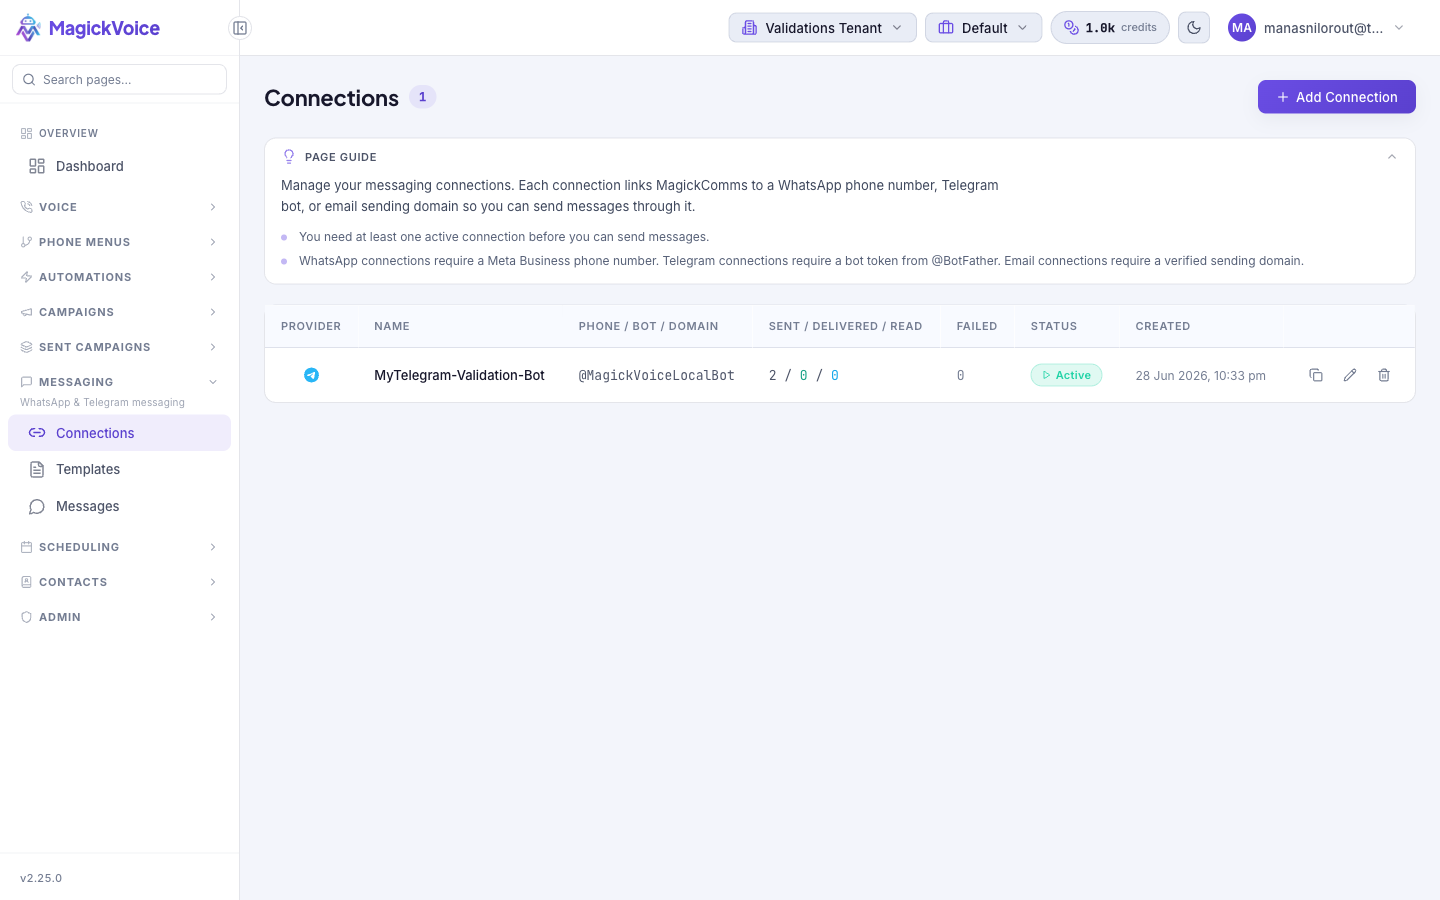
- Open Connections. The count beside the heading shows how many connections exist, and the table lists one row per connection.
- Read across the columns: Provider (WhatsApp, Telegram, or Email), Name, the connection's address (Phone / Bot / Domain), the Sent / Delivered / Read counts, the Failed count, Status, and Created date.
- Check Status to confirm a connection is usable — for example, "Active — Currently running and operational" means it is running and can send.
- Select any row to open its connection detail page for the full connection information, stats, and provider-specific setup such as an invite link or QR code.
3. Add a connection
Create a new connection when you need a new sending identity or channel.
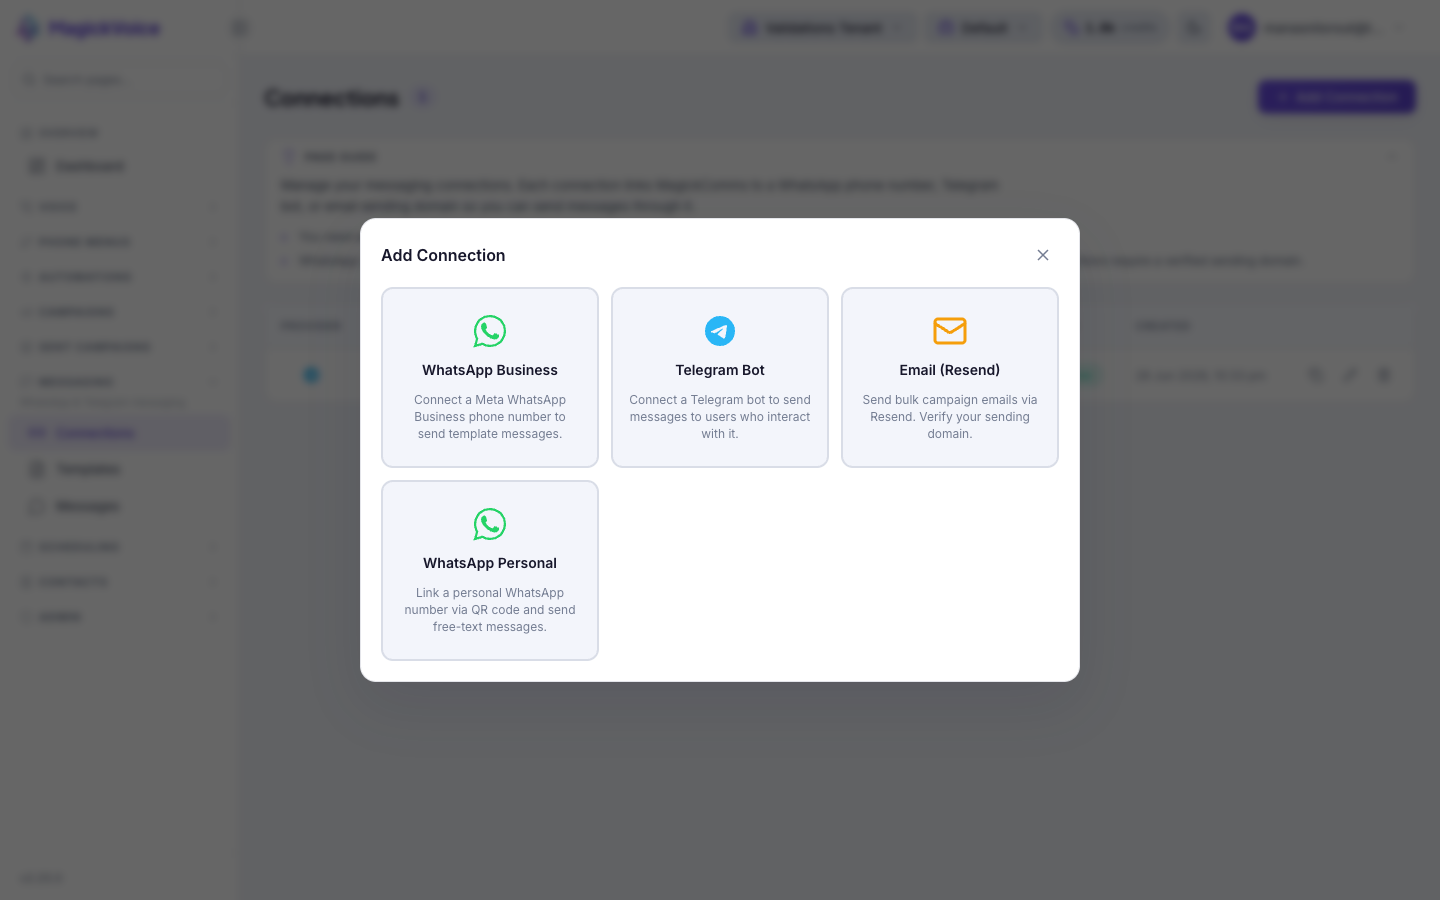
- Select Add Connection to open the provider picker dialog. It shows four cards: WhatsApp Business ("Connect a Meta WhatsApp Business phone number to send template messages"), Telegram Bot ("Connect a Telegram bot to send messages to users who interact with it"), Email (Resend) ("Send bulk campaign emails via Resend. Verify your sending domain"), and WhatsApp Personal ("Link a personal WhatsApp number via QR code and send free-text messages").
- Choose the card for the channel you want. Each opens a form with the fields that provider needs, described in the sections below.
- Fill in the required fields and select Create, or Cancel to close without adding. The new connection appears in the list.
- After creating, open the connection's detail page to finish any provider-specific setup — for WhatsApp Personal, scanning the QR code to link the account; for Email, completing DNS verification of the domain.
4. Add a Telegram connection
Connect a Telegram bot so it can message users who interact with it.
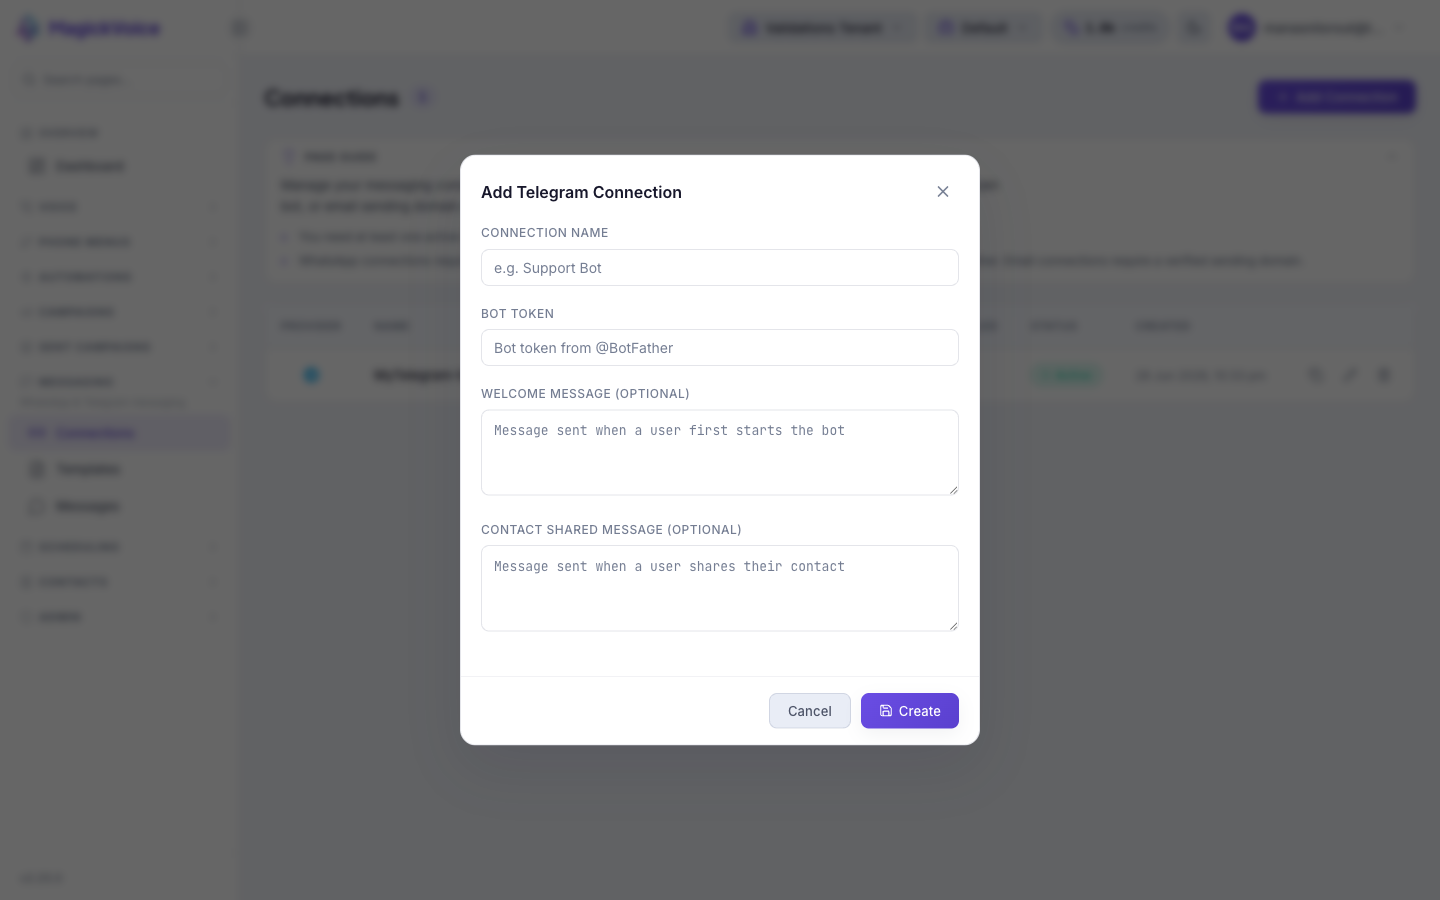
- On the Telegram card, select it, then enter a Connection Name (for example, "Support Bot") to identify it in the list.
- Enter the Bot Token obtained from @BotFather.
- Optionally set a Welcome Message — the message sent when a user first starts the bot — and a Contact Shared Message, sent when a user shares their contact.
- Select Create. The connection's detail page then provides an invite link to share with customers so they can start the bot and share their phone number.
5. Add a WhatsApp Business connection
Connect a Meta WhatsApp Business phone number for template-based messaging.
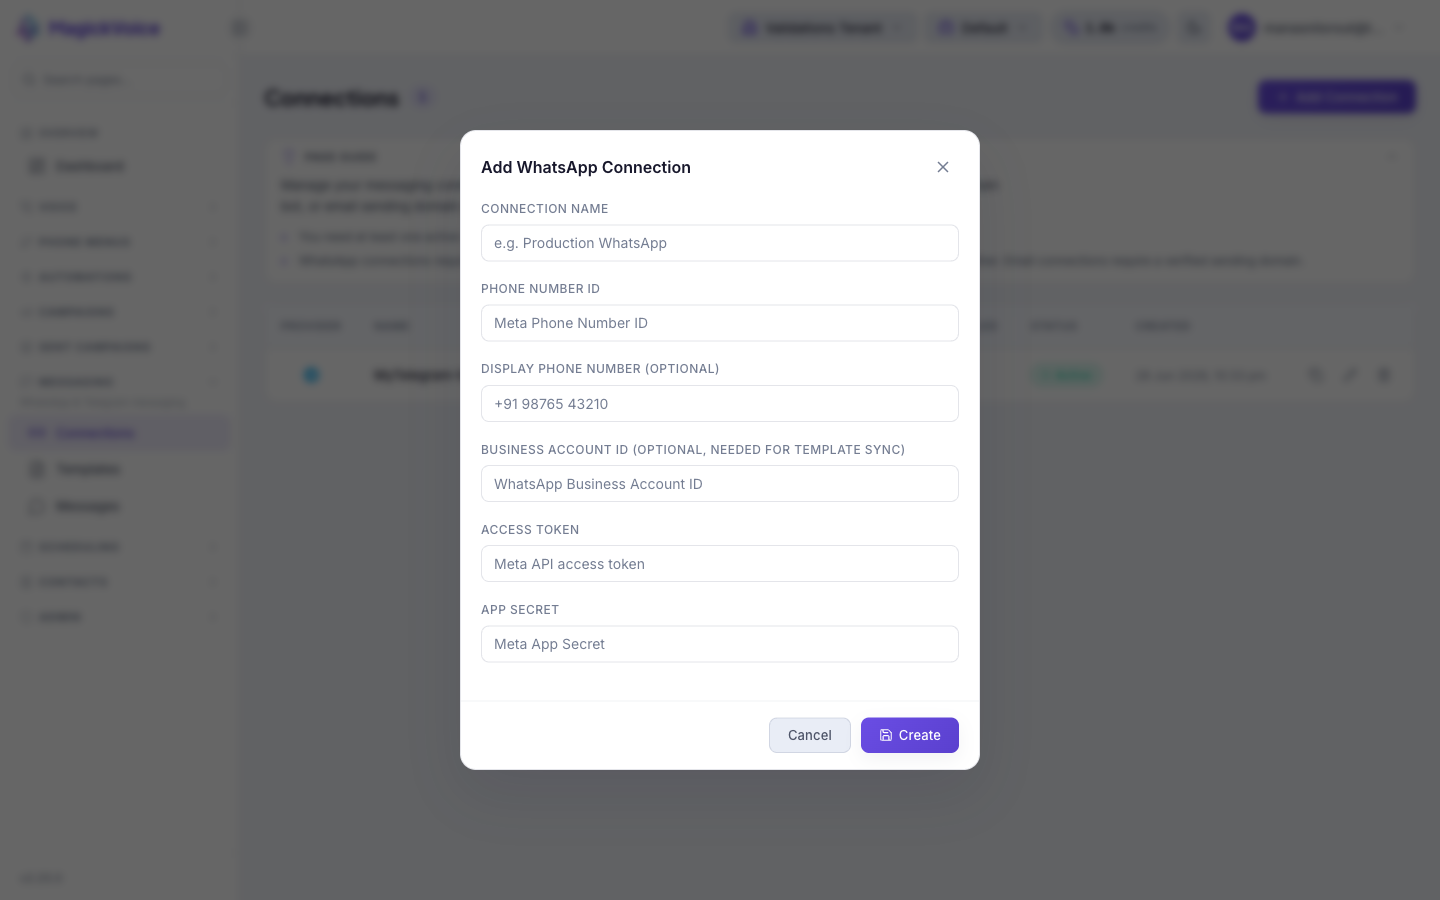
- Enter a Connection Name (for example, "Production WhatsApp").
- Enter the Phone Number ID (the Meta Phone Number ID) and, optionally, the Display Phone Number shown to recipients.
- Optionally enter the Business Account ID (the WhatsApp Business Account ID), which is needed for template sync.
- Enter the Access Token (Meta API access token) and the App Secret (Meta App Secret), then select Create. Use approved messaging templates to send through this connection.
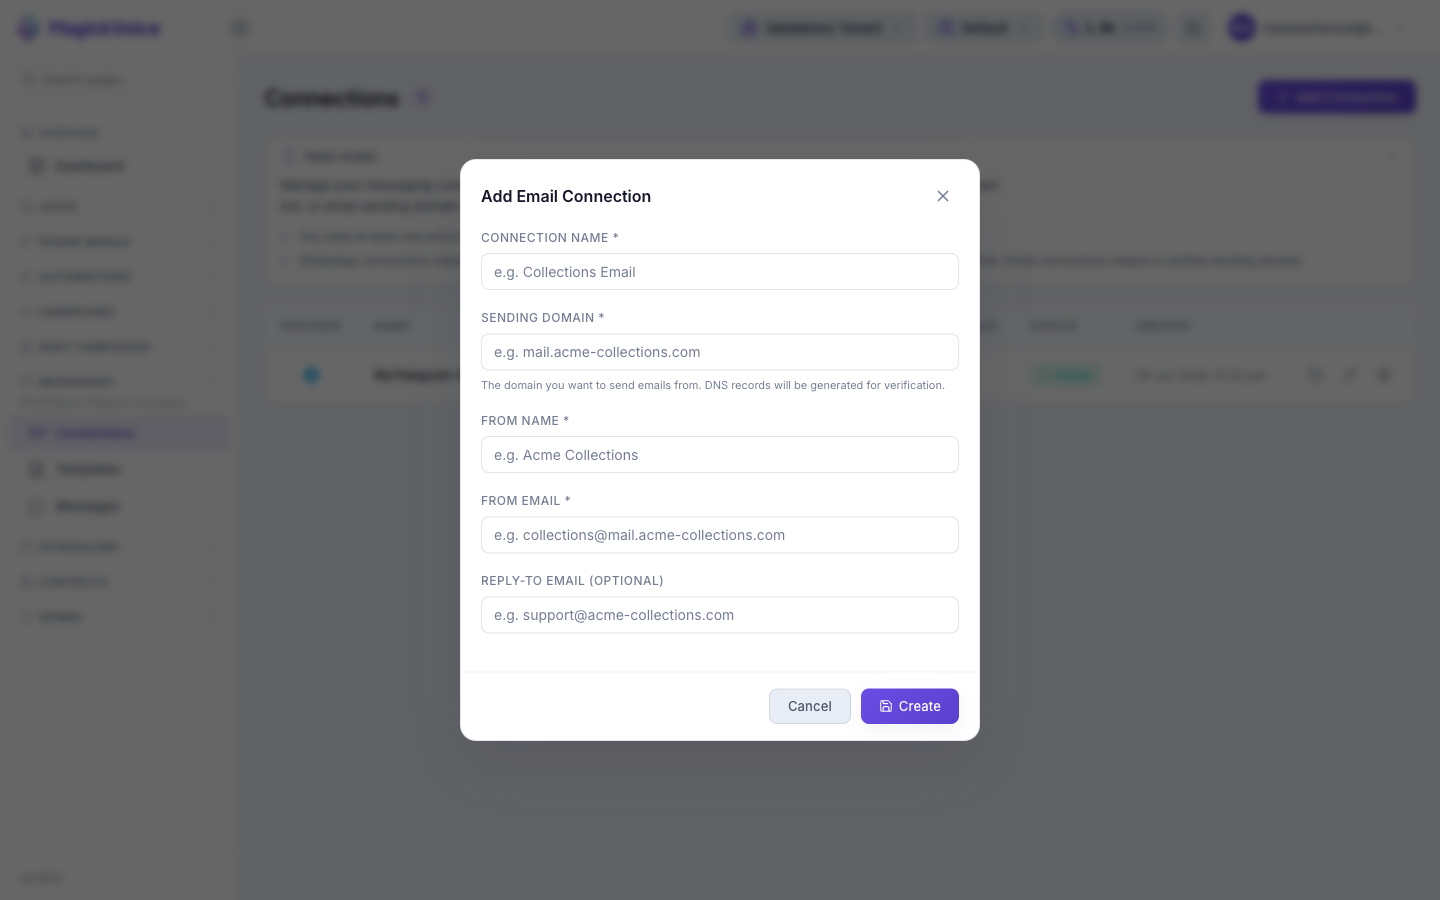
6. Add an Email connection
Connect a verified sending domain to send campaign emails via Resend.
- Enter a Connection Name (for example, "Collections Email").
- Enter the Sending Domain (for example, "mail.acme-collections.com") — the domain you want to send emails from. DNS records will be generated for verification.
- Set the From Name (for example, "Acme Collections") and the From Email (for example, "collections@mail.acme-collections.com"), and optionally a Reply-To Email.
- Select Create. Complete the DNS verification for the domain, then send using your messaging templates.
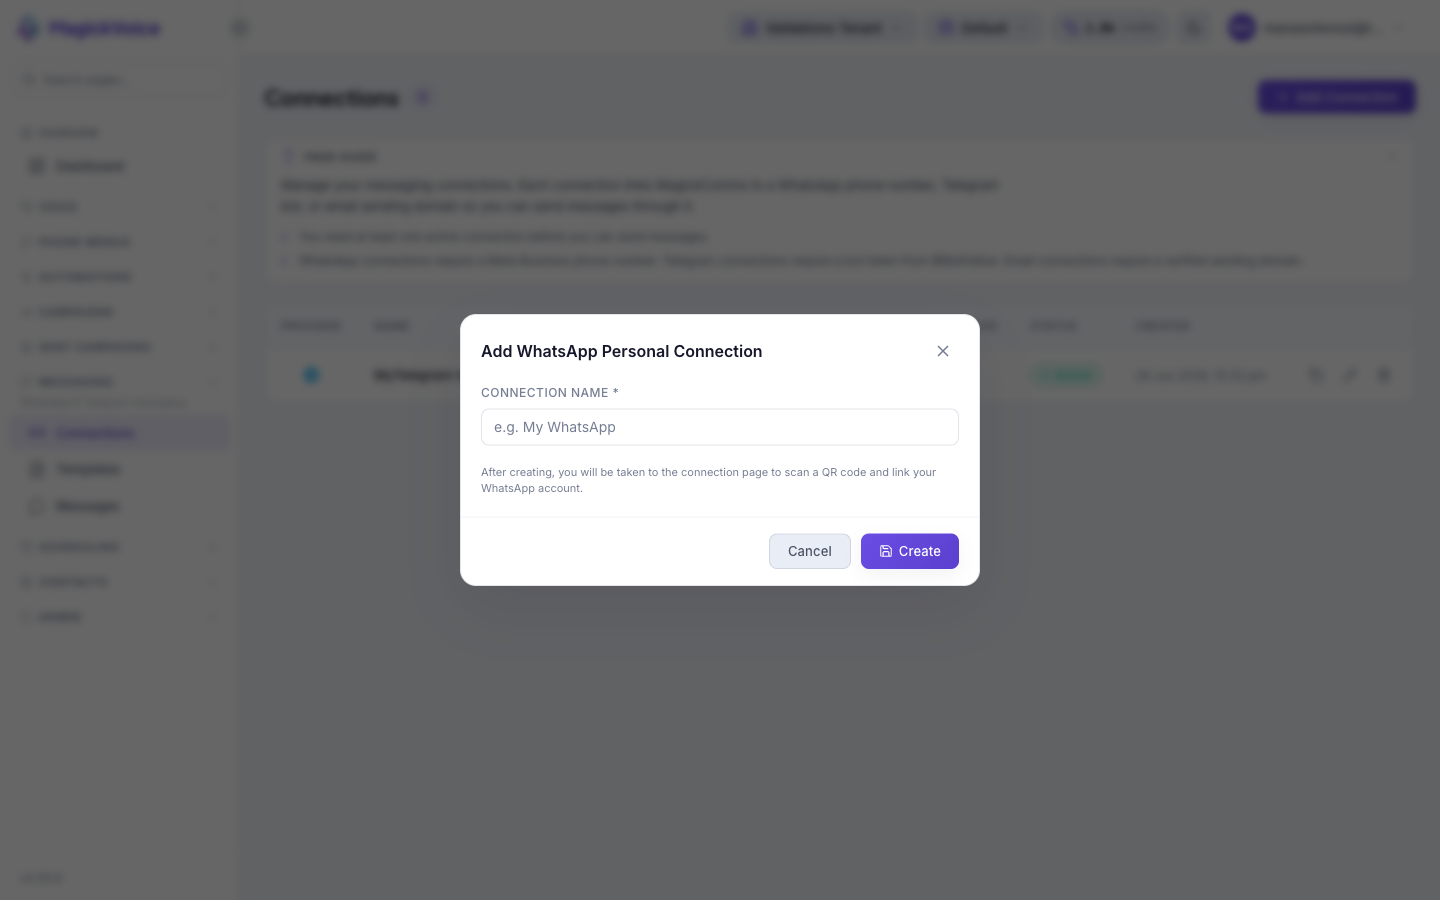
7. Add a WhatsApp Personal connection
Link a personal WhatsApp number by QR code to send free-text messages.
- Enter a Connection Name (for example, "My WhatsApp").
- Note the on-screen message: after creating, you will be taken to the connection page to scan a QR code and link your WhatsApp account.
- Select Create.
- On the connection detail page, scan the QR code with the WhatsApp app on the phone you are linking to complete the connection.
8. Manage an existing connection
Keep connections current and remove ones you no longer use.
- Use Copy invite link on a row to copy the connection's share link — most useful for Telegram, where customers use it to start the bot.
- Use Edit on a row to change a connection's settings, such as its name or credentials.
- Use Revoke on a row to disable a connection you no longer want to send through. Confirm it is not still used by an automation or a pending message send before revoking it.
Tips and troubleshooting
- Keep connection health visible before sending important messages; disconnected accounts cannot deliver reliably.
- Open the message detail page for delivery evidence, payload review, and troubleshooting context.